Make informed decisions for your operation with information delivered right to your inbox.
Get the latest tools, innovations and science-based information for the Canadian beef industry, including seasonal production considerations and economic analyses.
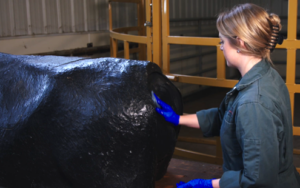
Calving cows out is a huge responsibility with many factors coming together to ensure a healthy calf hits the ground. A cow in ideal body condition, good breeding and genetics, and a clean environment are instrumental in a healthy calf being born.
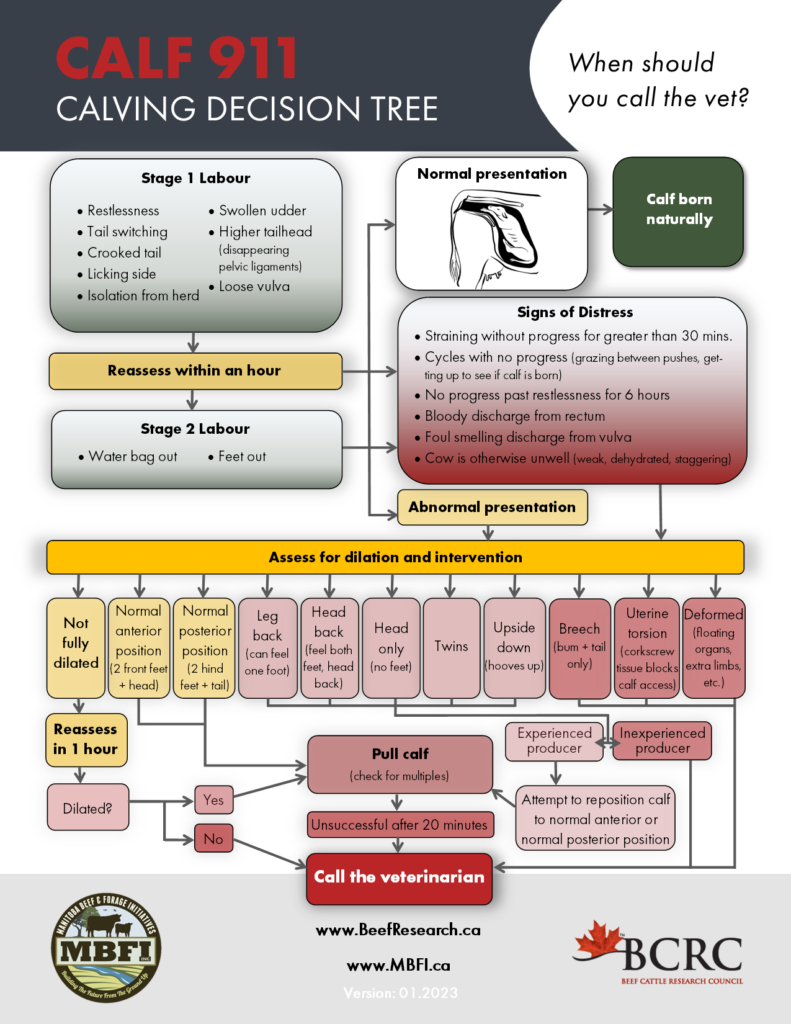
But what happens when something doesn’t go as planned? What if a calf comes backwards or a leg is turned back? Producers need to be prepared to assist a cow having a difficult birth (dystocia), including the knowledge of how and when to help. This video walks producers through the critical steps of assessing and managing difficult calvings.
Take the time to prepare.
Clean the cow and work area of any manure or other debris that could be introduced into the reproductive tract.
Wash the cow and your hands: Cleanliness (00:09) is an important step that is often overlooked despite evidence that using poor hygiene when palpating animals can lead to long term reproductive issues and delays in breed back intervals.
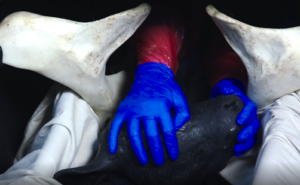
Wear gloves: Wearing palpation gloves will reduce risk of contracting zoonotic diseases (transmitted from animals to humans) such as Q fever and leptospirosis.
Use lubrication: Even the hair on a bare arm is enough to tear the delicate tissues of the birth canal. Proper lubrication will ensure that uterine tears and abrasions won’t lead to further complications and problems rebreeding.
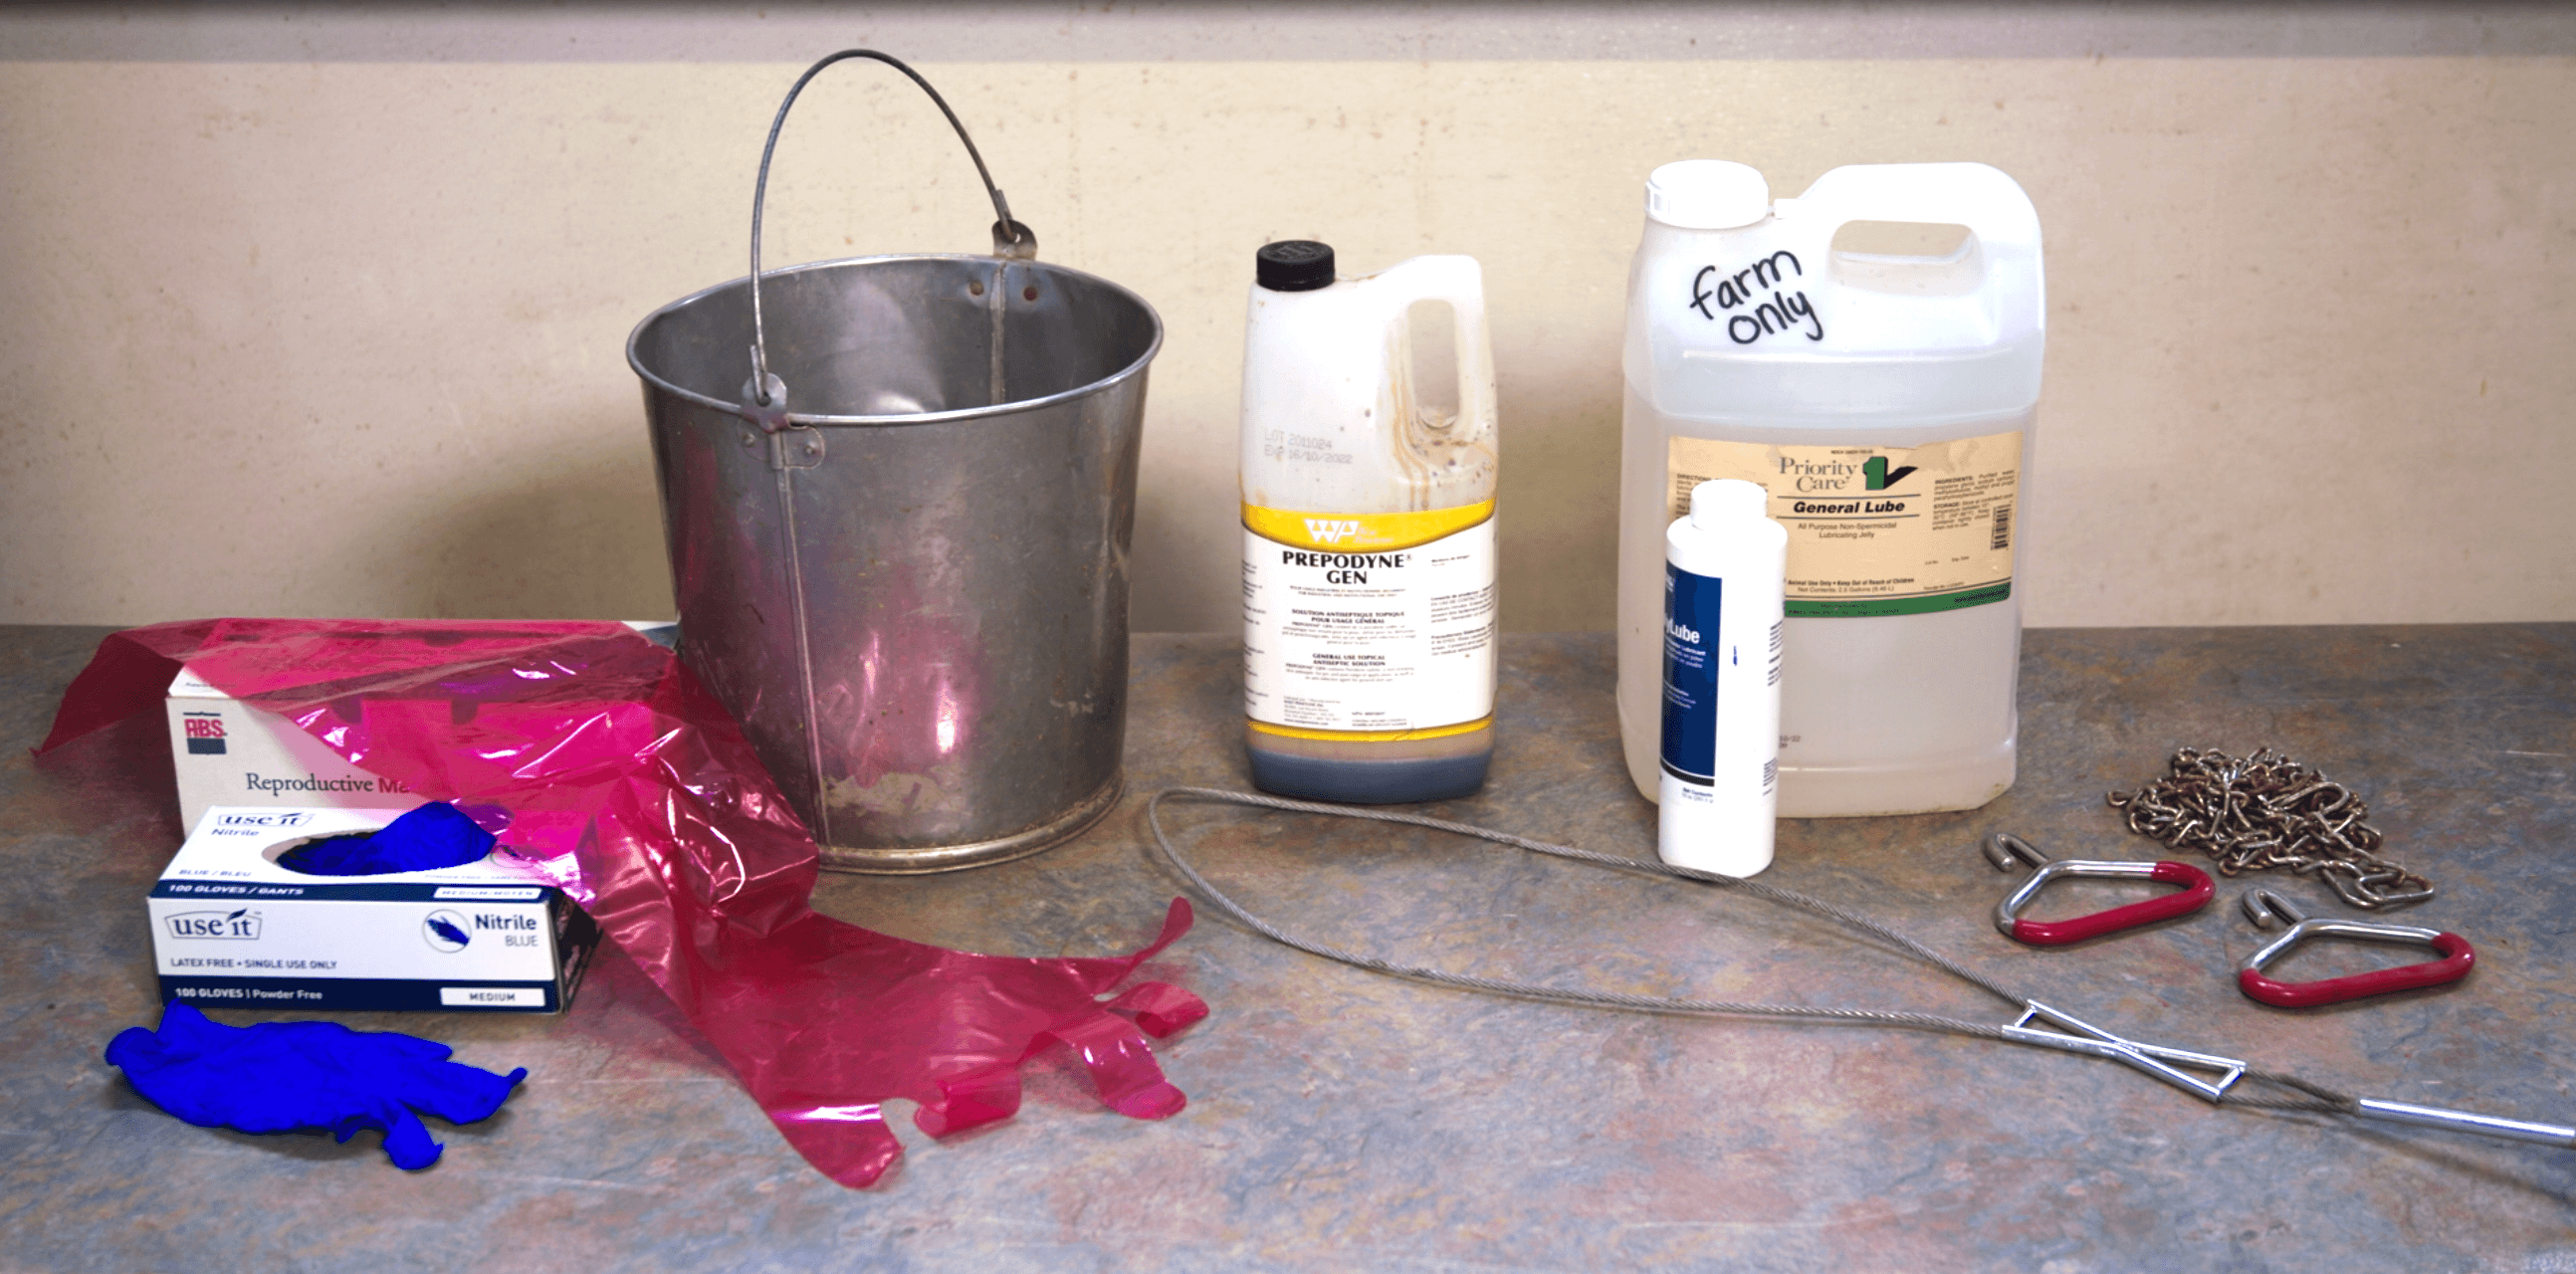
Common Calving Supplies: Hover on the pins in the image below for descriptions.
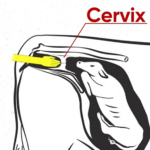
Check the cervix.
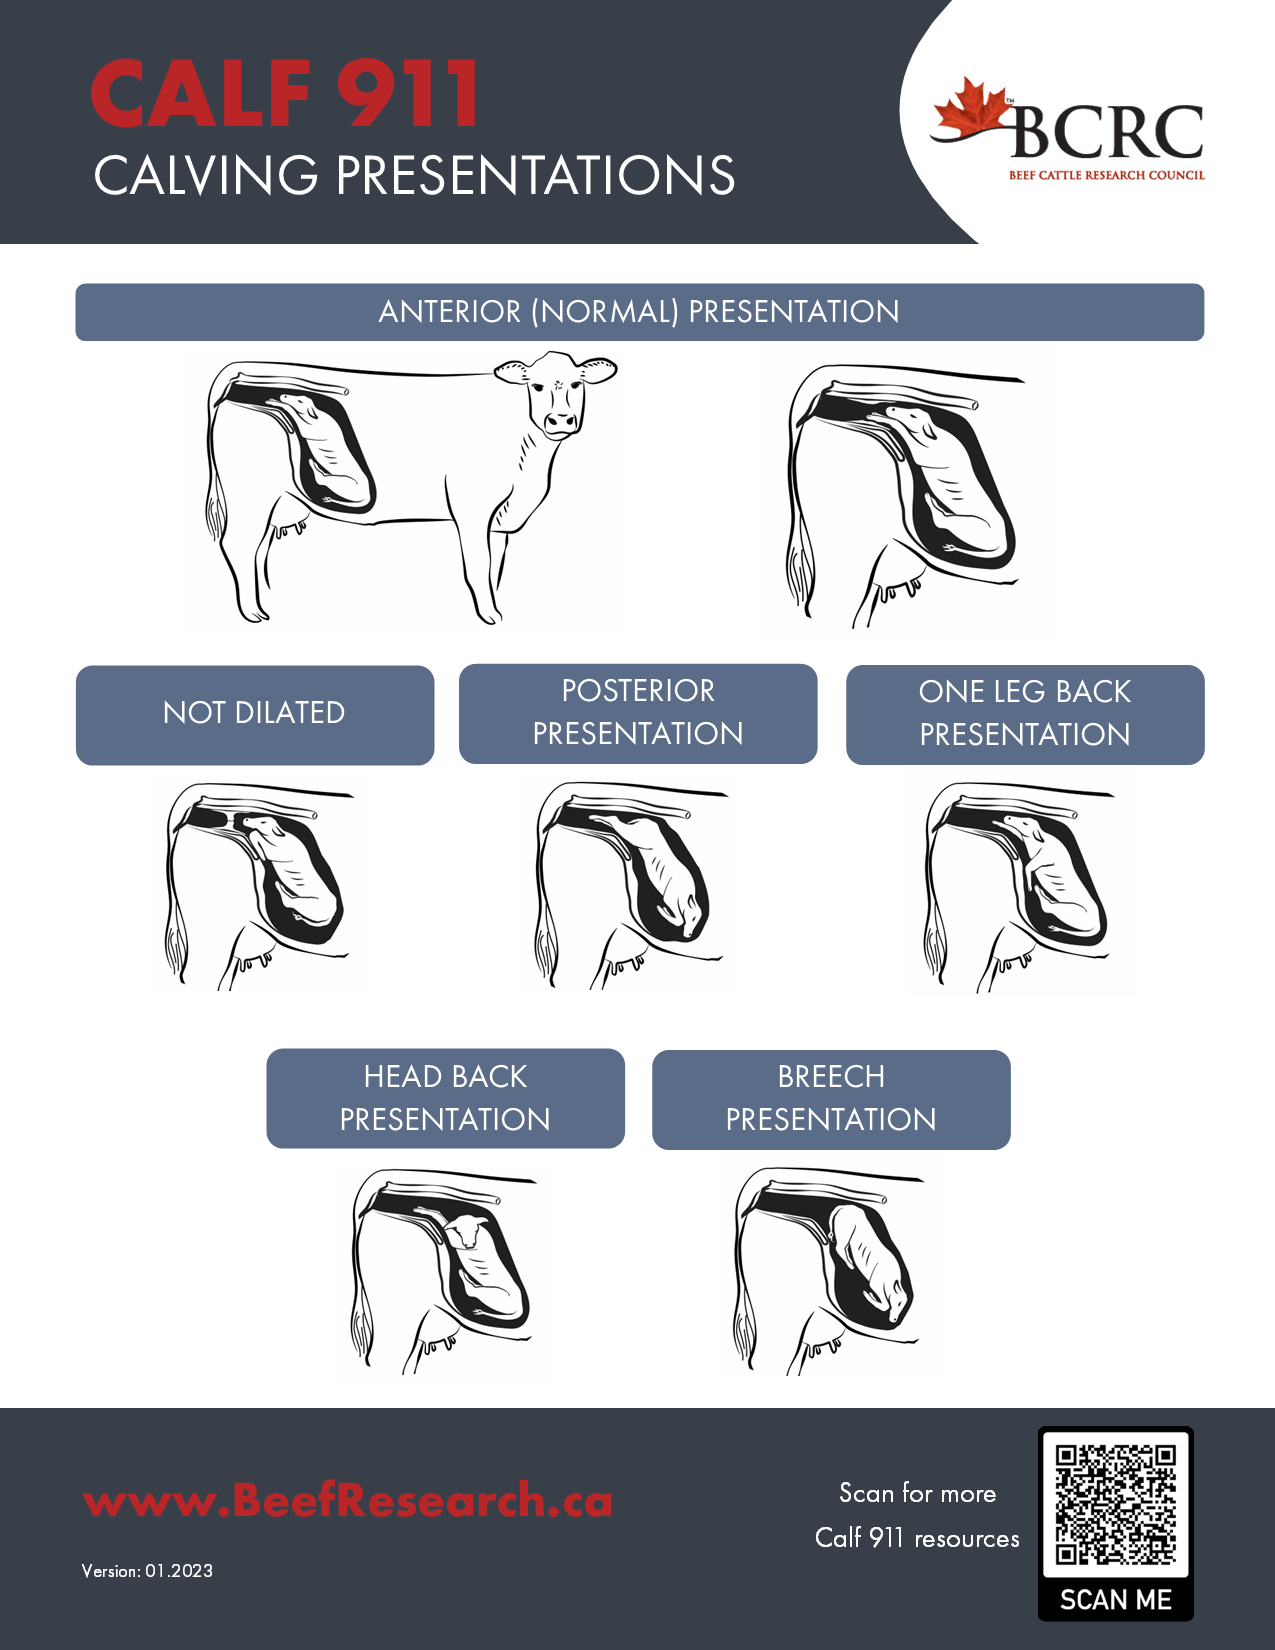
Palpate the cervix: For a calf to be delivered vaginally, the cow’s cervix must be open or “dilated.” (00:47) If the palpator is finding it difficult to reach the calf or theirhand is running into a blind sac, it is likely that the cow has not properly dilated.
If the cow’s cervix is not open, the calf is not ready to be born.
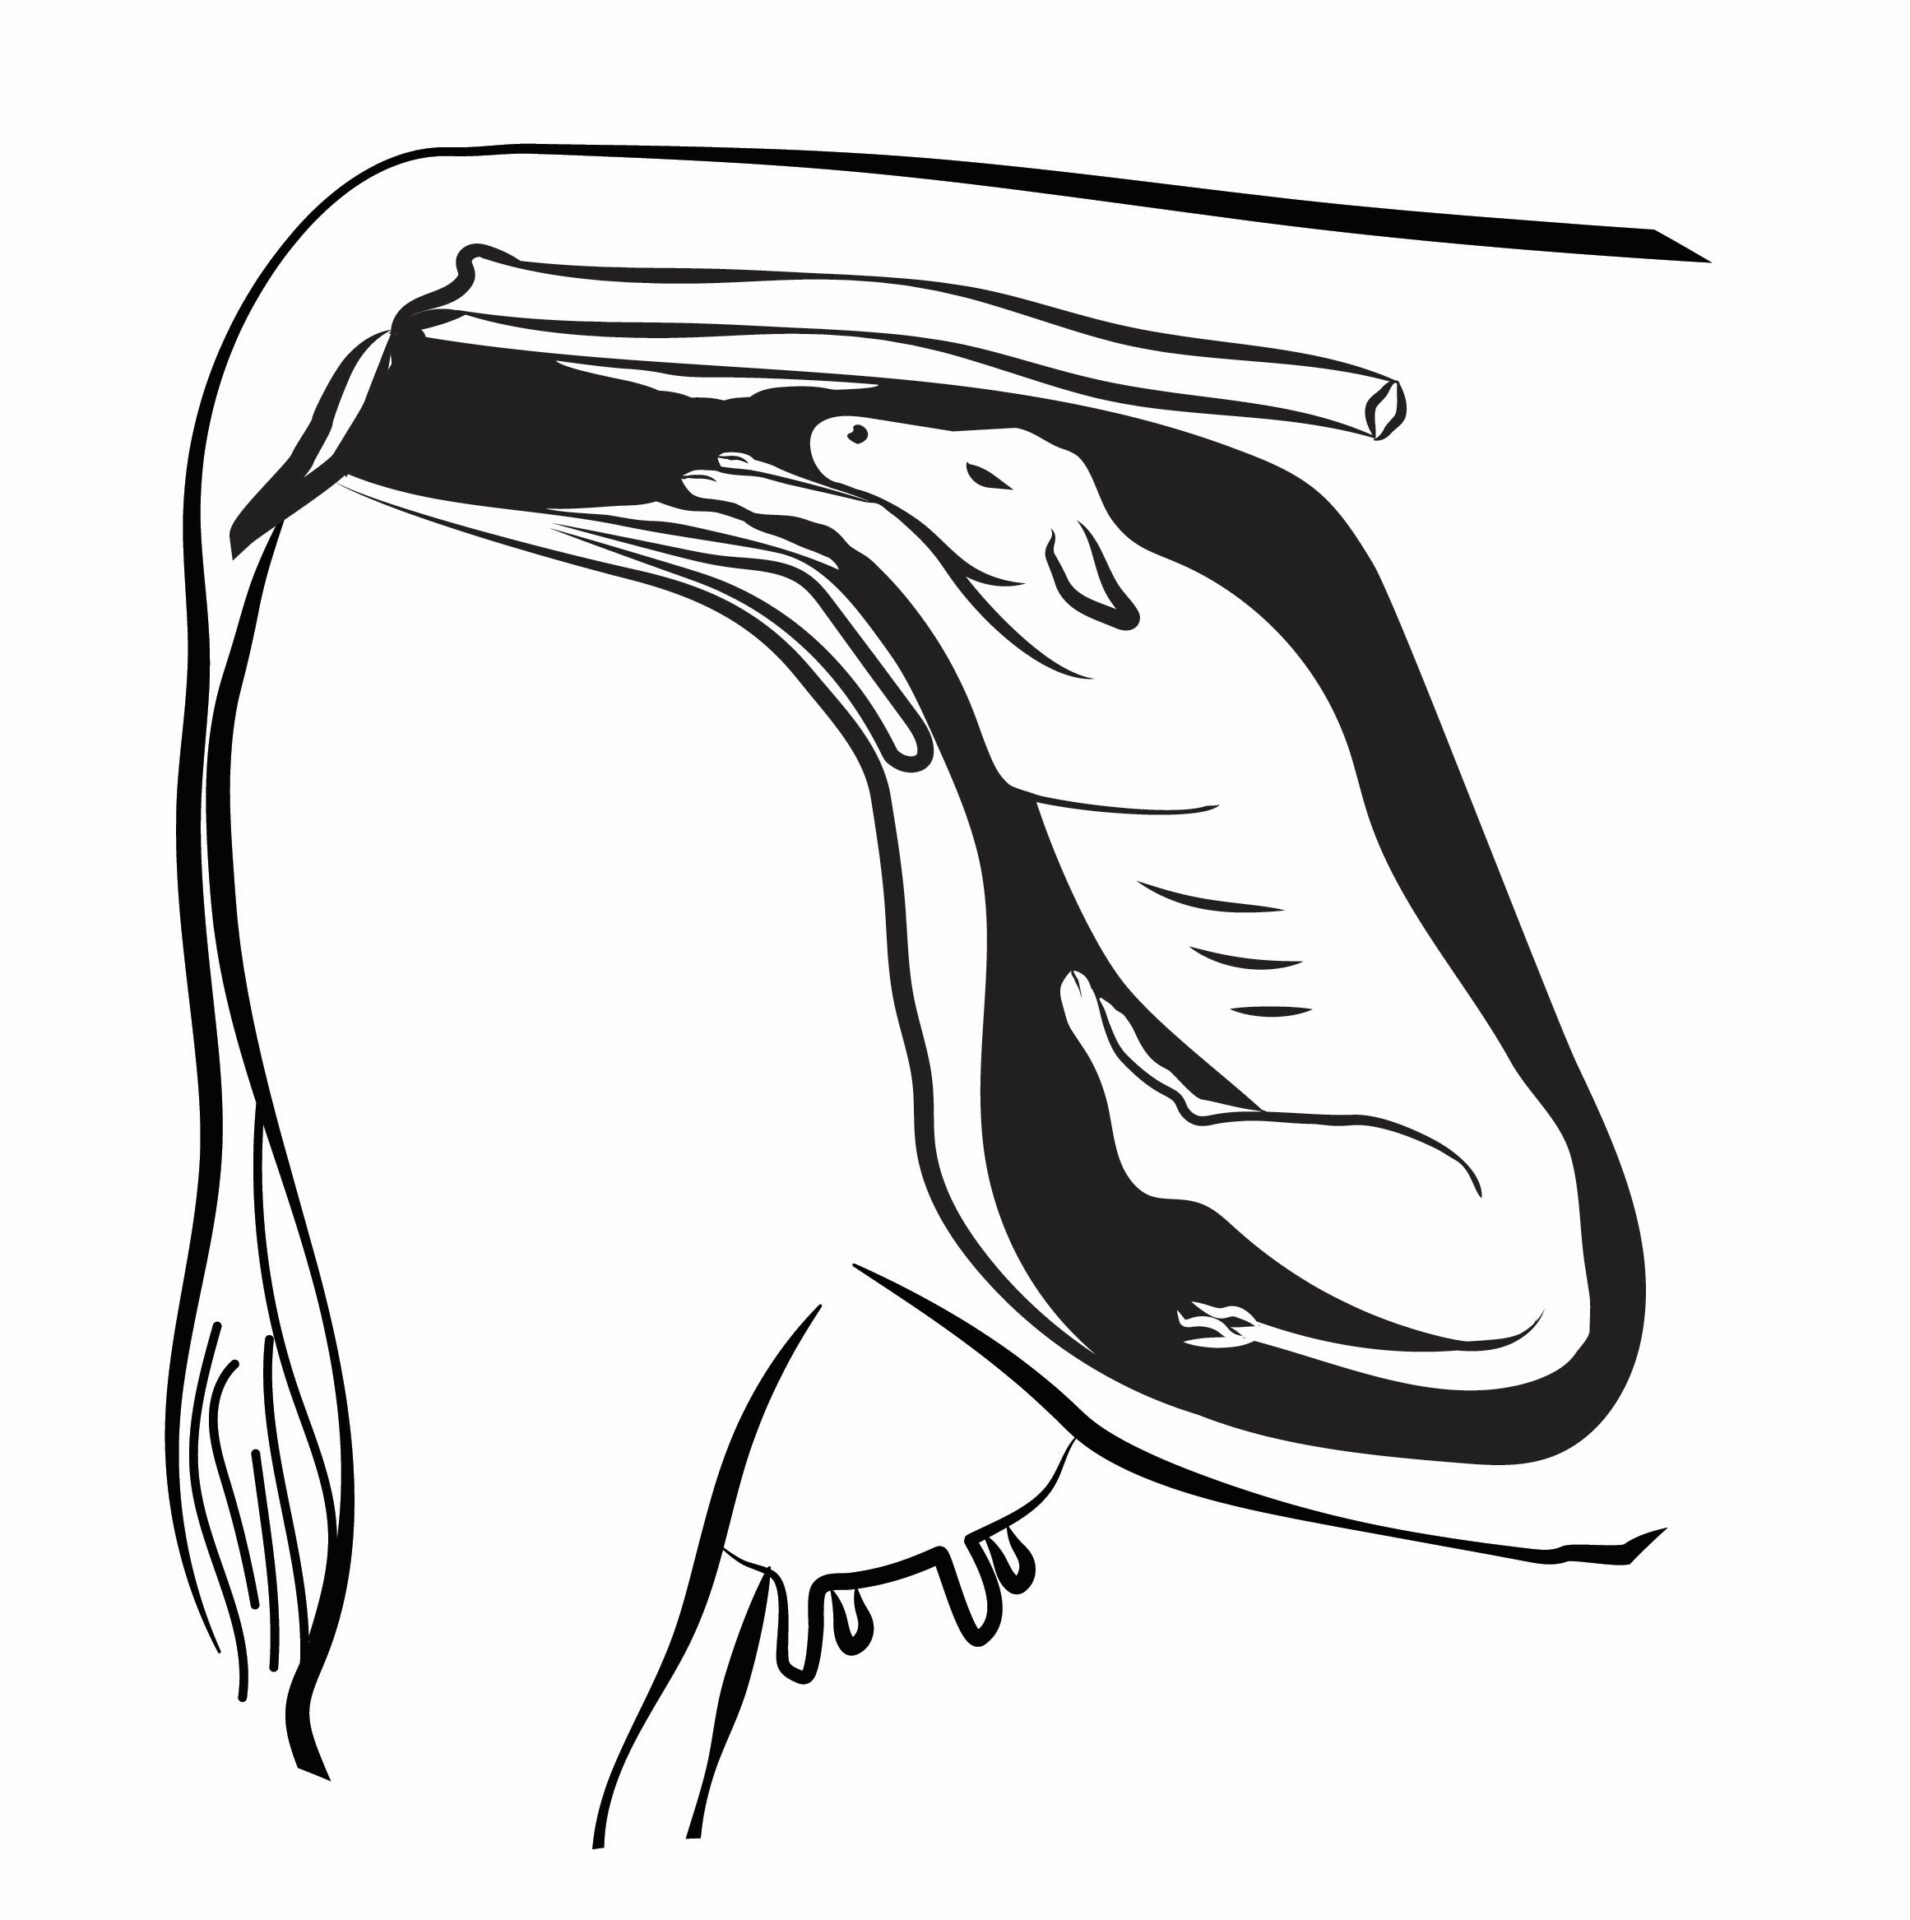
Determine the status of the calf.
Decide if there is room for the calf to be delivered: Run a hand around the circumference of the calf between the calf and the cow’s pelvis. (1:21)
If your hand fits between the calf and the cow, then she likely has enough room to deliver the calf with assistance. If you are unable to fit a hand in that space, veterinary assistance is recommended.
Check if thecalf is alive: To determine the calf’s viability, place a finger in its mouth for a suck reflex or tongue flick. The eyes can be checked for a blink, and in-between the toes can be pinched to check for a response.
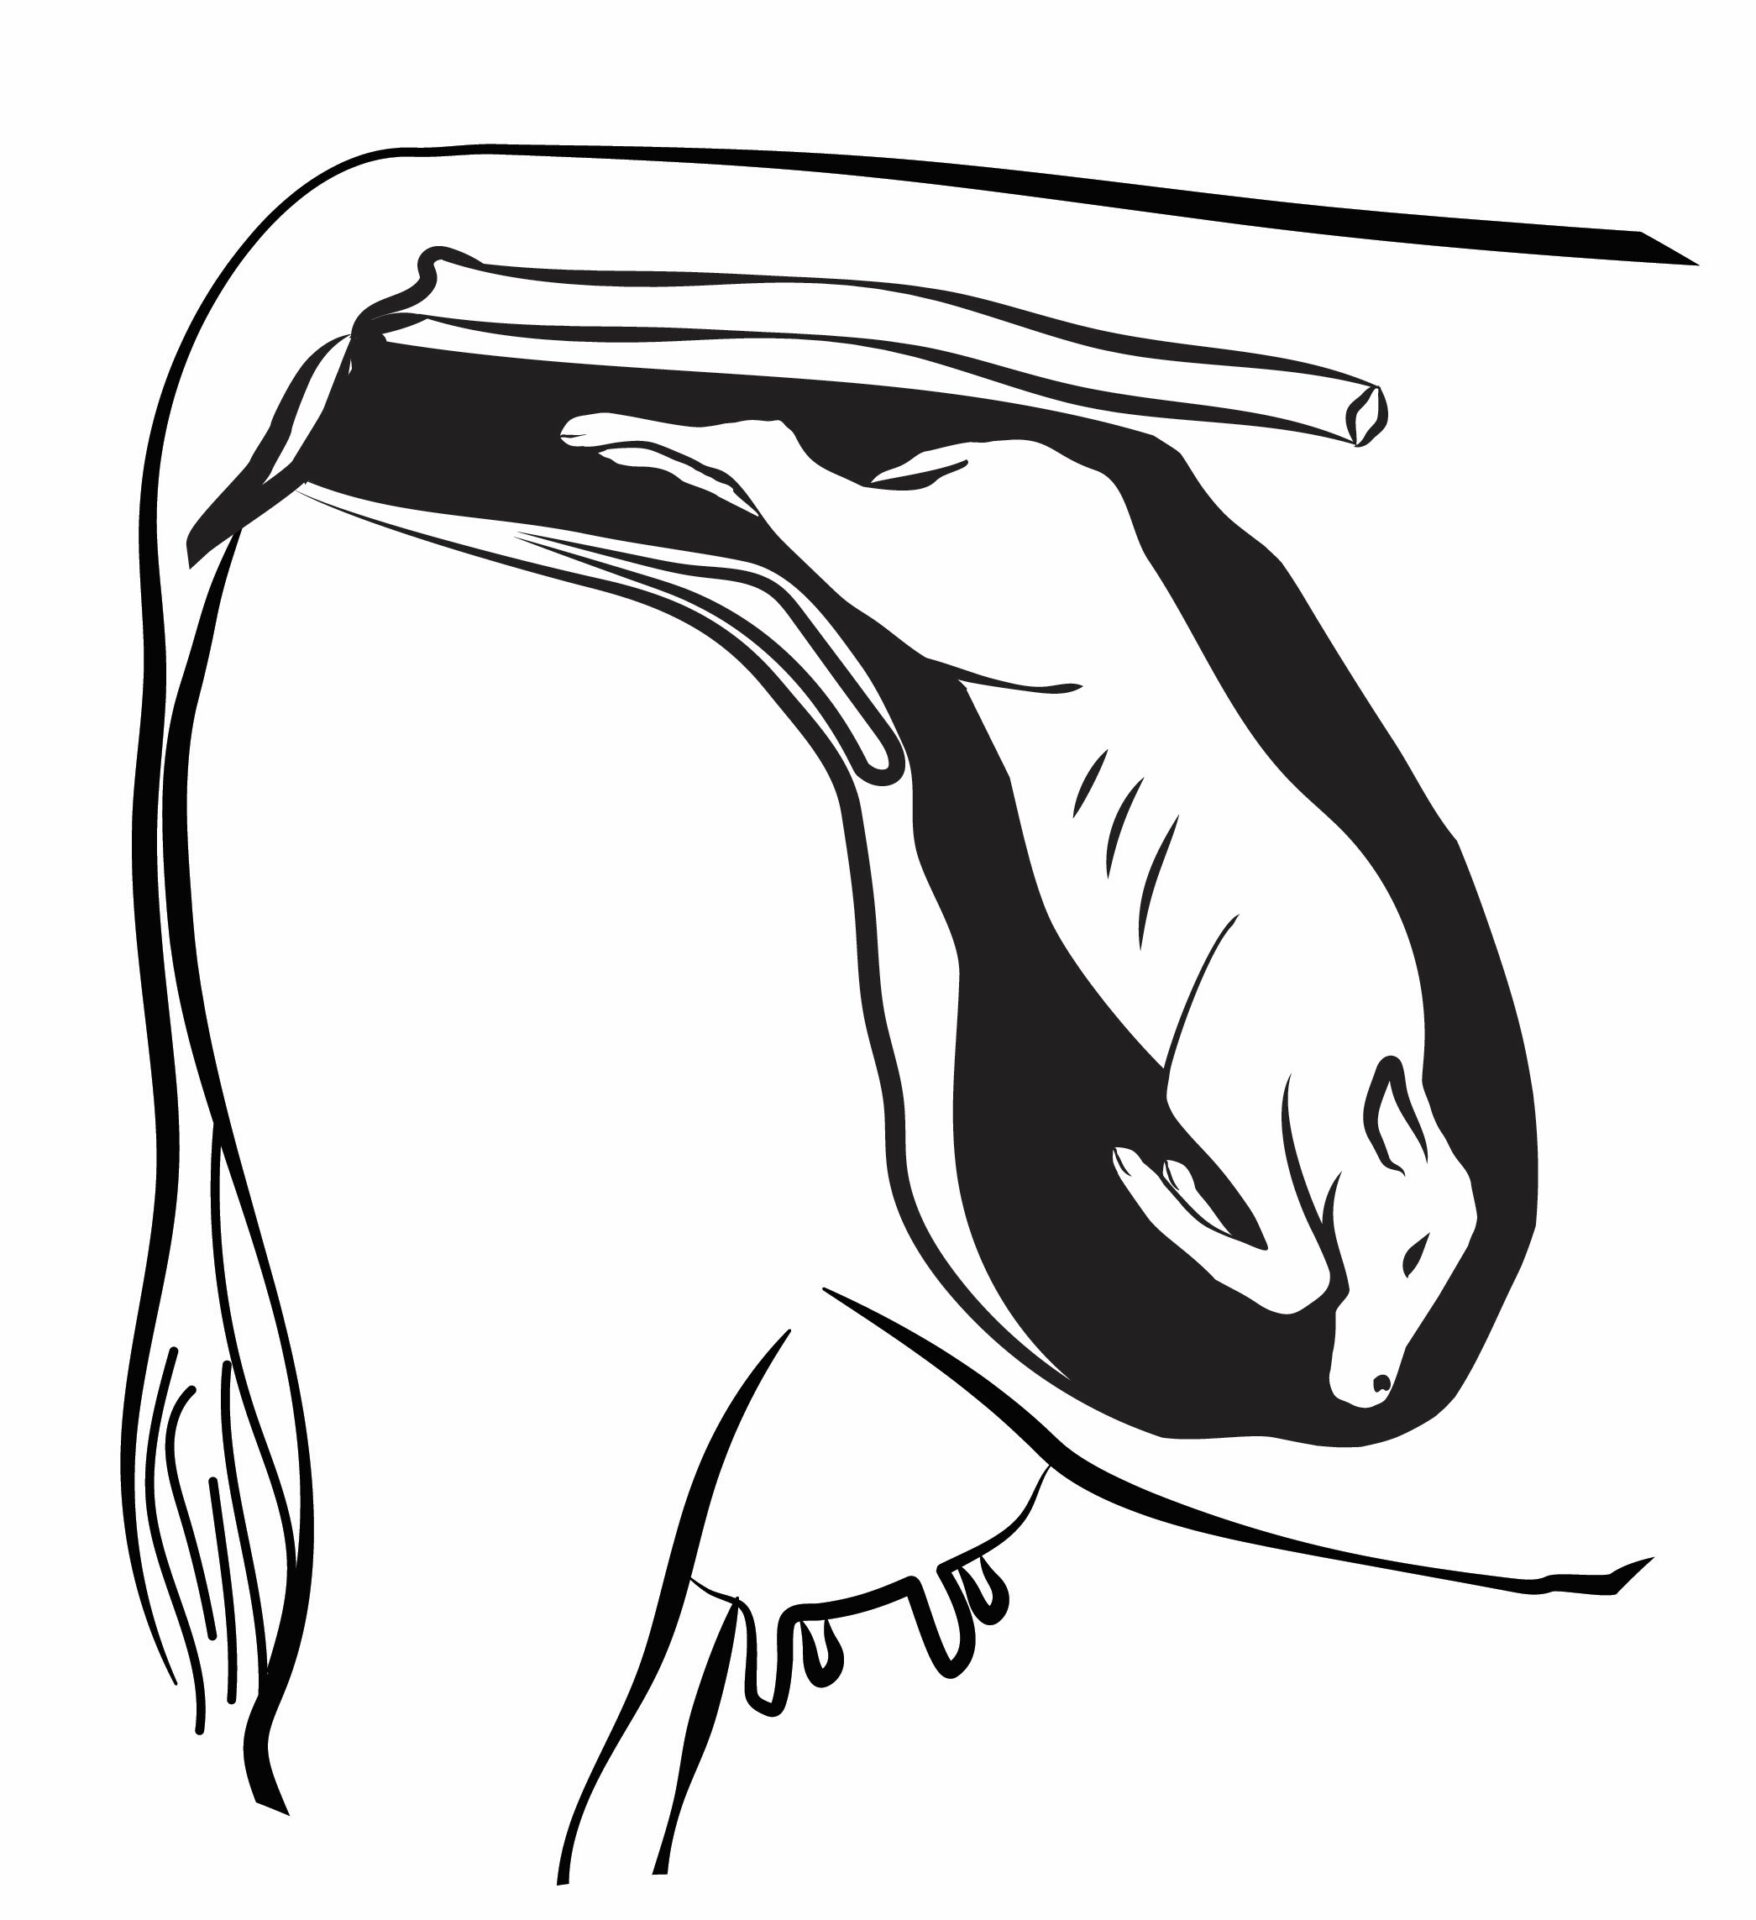
Assess an abnormal presentation: It can often be difficult to determine if the legs coming first are front limbs or hind limbs. One simple trick to determine this is to bend the joints of the lower leg. If the joints are both bending in the same direction, they belong to the forelimb. If they bend in opposite directions, they belong to the hind limb. (1:41)
Normal Presentations:
A normal presentation for a calf to be delivered is “anterior” or forward facing, with a head and two front feet coming first.
A normal “posterior” or backwards calf comes with two hind feet and a tail first.
When dealing with a head back position, the head can be slowly brought into position by gently grasping the muzzle, the ear or the lower jaw.
Head back: Calves that have their head pointed backwards will need to be gently pushed back into the uterus by putting pressure on the calf’s chest while the cow is at rest. (2:22)
Once it is pushed further back and the producer has more room to work within the cow, the head can be adjusted and brought up to the pelvic inlet. This can be done bygrasping the mouth with one hand, or placing your thumb and middle finger in the eye sockets. Care must be taken to never pull hard on the lower jaw as it can easily be fractured or injured.
Alternatively, a calving snare can be very helpful to help secure a calf’s head. The calving snare can be placed around the poll, behind the calf’s ears, and then secured in the mouth of the calf. The head can be deflected up and around into proper positioning, always being careful to protect the muzzle of the calf with your hand to protect the soft tissues of the cow from the sharp incisor teeth of the calf.
Once the head is in proper position, traction is placed on the legs to deliver the calf. It is important to note that often when a calf presents with a head back, it is due to a lack of room for the calf to advance into the pelvis. Care must be taken to ensure that the calf is not too large to be delivered vaginally.
Leg back: When correcting a retained limb, or a “leg back,” the same method of pushing the calf back into the cow to create more room is applied. The producer can work their way down the leg until the foot is reached, then cup the foot to protect the uterus from damage from the hoof capsule. Once the foot is secured, bend all the leg joints, and move up toward the spine and forward toward the cervix. (3:13)
The Rule of Three:
An attempt to pull a calf must ONLY be made once the calf presents with THREE requirements:
One head plus two front feet
One tail plus two hind feet
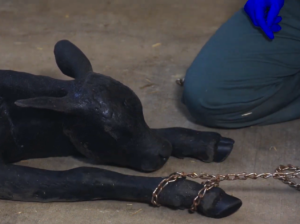
Place calving chains in a double half hitch over the top of the toes.
Apply calving chains.
Use a double half hitch: Unfortunately, many calves suffer broken legs due to improperly placed calving chains. The proper placement and use of the double half hitch method is outlined in the video ensuring that pressure is placed evenly on the legs and helping to direct the toes downward with each pull, ensuring the toes stay far away from the delicate tissues of its mother. (3:51)
Pull the calf.
Work with the cow:Only pull or apply pressure when the cow is having a contraction or “pushing.” Never pull when she is at rest.
Use a seesaw method:Thisis a technique which applies pressure on alternating legs as the calf advances into the birth canal. This allows for the widest part of the calf to enter the pelvis one shoulder at a time, creating more space. (4:35)
Apply pressure in an arc: For a forward-facing calf, pressure should always be applied in the shape of an arc as the calf moves through the birth canal. Begin by applying force in an upward motion as the front feet and head are advanced, then the chest is delivered by pulling straight back, and finally the pelvis and hind limbs can be pulled in a downward fashion to allow gravity to aid in the delivery. (5:03)
Rotate the pelvis: If the pelvis of the calf is binding in the cow’s pelvis, it can be manually rotated to 45 degrees, shifting the hip angle and preventing hip lock.
Cross the hind limbs: In the case of a backwards calf, it is helpful to cross the hind limbs when pulling. This will cause the calf’s hips to rotate preventing hip lock.
If a cow requires assistance during calving it is vital that producers understand the proper methods to intervene. Just as important is knowing when to call for assistance.
Sharing or reprinting BCRC posts is welcome and encouraged. Please credit the Beef Cattle Research Council, provide the website address, www.BeefResearch.ca, and let us know you have chosen to share the article by emailing us at [email protected].
The BCRC is funded by a portion of the Canadian Beef Cattle Check-Off.
Your questions, comments and suggestions are welcome. Contact us directly or spark a public discussion by posting your thoughts below.
